Heart Shaped Cake - Easy Baking And Decorating
There's something truly special about a treat shaped like a heart, isn't there? It just seems to whisper of affection and care, making any occasion feel a little more warm and fuzzy. Whether it's for a special day, a birthday, or just because you want to show someone you're thinking of them, a dessert in this lovely shape always hits the mark. It's a wonderful way to bring a smile to faces, and honestly, it’s not nearly as tricky to put together as you might imagine.
You might think you need a special pan, a very specific kind of mold, or perhaps some advanced baking skills to achieve that perfect heart shape. Well, you know, that's actually not the case at all. With just a few simple kitchen items you probably already have, and a little bit of creative thinking, you can transform ordinary round baked goods into something quite charming and full of sentiment. It’s a trick that saves you from buying extra equipment and, really, makes the whole process feel a bit more clever.
This particular guide will walk you through creating a truly delightful heart shaped cake, one that’s tender and soft, with a lovely crimson hue, and topped with a rich, tangy spread. It’s a classic pairing that almost everyone enjoys, and it looks absolutely adorable when made for a special occasion like Valentine's Day. So, if you're looking to make a sweet gesture, or just want to try a fun new baking project, this is definitely a good place to begin, as a matter of fact.
Table of Contents
- Crafting a Heart Shaped Cake - A Sweet Surprise
- How Can Round Pans Make a Heart Shaped Cake?
- What Makes a Red Velvet Heart Shaped Cake So Special?
- Decorating Your Heart Shaped Cake - Pretty Touches
Crafting a Heart Shaped Cake - A Sweet Surprise
Putting together a heart shaped cake can feel like a truly heartwarming project, especially when you think about the smiles it will bring. It’s about more than just the ingredients; it’s about the thought, the effort, and that sweet, personal touch. Many people believe that making something so visually appealing requires a lot of specialized knowledge, but that’s actually not the case at all. You can start with something as simple as a pre-packaged baking helper, and still achieve a wonderfully impressive result, you know.
The beauty of this particular approach is that it makes the whole process very approachable, even for those who might not spend every weekend in the kitchen. It’s about taking something straightforward and giving it a bit of a creative twist, turning an ordinary baked good into a piece of edible art. The idea is to give you the confidence to try it yourself, knowing that the steps are clear and the outcome will be something you’re truly proud to share. So, it’s almost like a little secret you get to share with your loved ones.
We’ll cover everything from getting the basic shape right, using common kitchen items, to making that delicious red velvet base and the creamy topping that goes with it so perfectly. Then, we’ll talk about adding those pretty finishing touches that make it look extra special, especially for days like Valentine's Day. It’s a complete guide to creating a dessert that looks charming and tastes even better, in a way.
How Can Round Pans Make a Heart Shaped Cake?
It might seem a little puzzling at first, but transforming round baked layers into a distinct heart shape is actually quite clever and surprisingly simple. You don't need to go out and buy any new, specialized baking tins for this. All it really takes is a couple of round pans, a square pan, and a bit of careful cutting and arrangement. This method makes the whole process accessible and budget-friendly, which is pretty nice, you know.
The trick involves baking one square layer and two round layers. Once they’re cooled, you’ll cut the round ones in a particular way and then arrange all the pieces on a serving plate. The straight edge of the square piece forms the bottom point of the heart, and the curved halves of the round pieces create the rounded top. It’s a bit like putting together a puzzle, but a very delicious one, in some respects.
This approach means you can use your favorite go-to recipes, whether it’s from scratch or, say, a pre-packaged mix. The focus here is on the shaping, not necessarily on a complicated recipe, which makes it much less intimidating. So, you can really concentrate on getting that lovely shape just right, and then move on to the fun part of adding the sweet spread and decorative elements, more or less.
Gathering Your Tools for a Heart Shaped Cake
Before you even think about mixing any ingredients for your heart shaped cake, it's a good idea to gather all the things you’ll need. Having everything ready and within reach makes the baking process much smoother and less stressful. You won't be scrambling for a measuring cup or a mixing bowl halfway through, which, you know, can really make a difference in how enjoyable the experience is.
For the pans themselves, you'll want two round baking tins, ideally of the same size, and one square baking tin that matches the diameter of your round ones. For instance, if your round pans are eight inches across, your square pan should also be eight inches on each side. This consistency in size is quite important for getting the proportions right when you put the pieces together to form your heart shaped cake. You’ll also need parchment paper to line the pans, which helps prevent sticking and makes getting the layers out much easier, typically.
Beyond the pans, you’ll need standard baking tools: mixing bowls, a whisk or an electric mixer, measuring cups and spoons, and a cooling rack. A good, sharp serrated knife will be very helpful for cutting the round layers cleanly. And, of course, a sturdy serving platter or a cake board is essential for assembling and presenting your beautiful heart shaped cake. Having these items ready will really set you up for success, as a matter of fact.
Assembling Your Heart Shaped Cake Shape
Once your baked layers are completely cool – and this is a really important step, as warm layers are much harder to handle and cut – it’s time to put them together to form that lovely heart shaped cake. Patience here pays off, because trying to rush this part can lead to crumbly edges or layers that just don’t hold their form. You want them to be cool to the touch, almost chilled, actually.
Take your two round layers and cut each one exactly in half. You’ll end up with four semi-circles. Now, place your square layer on your chosen serving surface, with one of its corners pointing downwards, like a diamond shape. This will form the lower, pointed part of your heart shaped cake. Then, take two of the semi-circles and position one on each of the top two sides of the square. The flat edge of the semi-circle should align with the side of the square, and the curved part will create the rounded top of the heart. It’s almost like magic how it comes together, really.
You’ll use a little bit of your sweet spread to act as "glue" between the pieces, making sure they stay put. Once the basic shape is formed, you can then apply a thin layer of spread all over the entire assembled shape. This is often called a "crumb coat," and it helps to seal in any loose crumbs before you apply your final, thicker layer of spread. It’s a small step that makes a big difference in the finished look of your heart shaped cake, basically.
What Makes a Red Velvet Heart Shaped Cake So Special?
When you think about a truly memorable heart shaped cake, a tender red velvet one often comes to mind. There’s something about its striking crimson color, paired with that signature rich, tangy topping, that just feels incredibly luxurious and comforting all at once. It's a flavor combination that has stood the test of time, and it’s especially fitting for occasions where you want to express warmth and affection, like Valentine's Day, you know.
The distinct flavor of red velvet comes from a blend of cocoa powder, a touch of vinegar, and buttermilk, which react together to create a subtle tang and a wonderfully soft crumb. The red food coloring, of course, gives it that iconic, deep hue that makes it so visually appealing. It’s a bit of a classic, and for good reason, as a matter of fact. This particular kind of baked good offers a lovely contrast between its slightly chocolatey taste and the bright, creamy topping, making each bite a delightful experience, in a way.
Pairing this tender, flavorful base with a generous covering of rich, tangy cream cheese frosting is what truly sets it apart. The coolness and slight sharpness of the cream cheese cut through the richness of the baked good, creating a balanced and incredibly satisfying taste. It’s a combination that just works, and it’s why a red velvet heart shaped cake is such a popular choice for celebrations and special moments, pretty much.
Whipping Up That Tender Red Velvet Heart Shaped Cake Batter
Making the batter for your red velvet heart shaped cake is a pretty straightforward process, whether you’re starting from scratch or using a pre-packaged mix. If you’re going the mix route, just follow the directions on the box, but remember to add that crucial red food coloring to get the vibrant hue. You’ll want a good quality liquid or gel food coloring for the best results, as a matter of fact.
For a scratch recipe, you’ll typically begin by creaming together softened butter and sugar until the mixture is light and fluffy. Then, eggs are added one at a time, followed by the dry ingredients – usually flour, cocoa powder, baking soda, and a pinch of salt – alternating with wet ingredients like buttermilk and a touch of vinegar. The vinegar reacts with the baking soda, helping the baked good rise and giving it that characteristic tender texture. It’s a very specific chemical reaction that makes this baked good so unique, you know.
Finally, the red food coloring is stirred in until the batter reaches a deep, uniform crimson. Don't be shy with the coloring; you want that striking visual impact. Once the batter is ready, divide it evenly among your prepared round and square pans. Make sure not to overfill them, as the baked good will rise. Then, pop them into a preheated oven and bake until a wooden skewer inserted into the center comes out clean. This ensures your heart shaped cake layers are cooked through and ready for assembly, so.
The Magic of Cream Cheese Frosting for Your Heart Shaped Cake
No red velvet heart shaped cake would be complete without its classic companion: the rich, tangy cream cheese frosting. This topping is truly what brings the whole dessert together, offering a wonderful balance to the tender, slightly chocolatey base. It’s a spread that’s not too sweet, with a lovely tang that really brightens up the flavor, and it’s relatively simple to put together, honestly.
To make this delightful spread, you’ll need softened cream cheese, softened unsalted butter, powdered sugar (also known as confectioners’ sugar), and a splash of vanilla extract. The key is to make sure both the cream cheese and butter are at room temperature. This allows them to blend smoothly without lumps, giving you a wonderfully creamy texture for your heart shaped cake. You really want that smooth, spreadable consistency, you know.
First, beat the softened cream cheese and butter together until they are light and fluffy. This can take a few minutes with an electric mixer. Then, gradually add the powdered sugar, a cup at a time, beating well after each addition until it’s fully incorporated and the mixture is smooth. Finally, stir in the vanilla extract. If the spread seems too thick, you can add a tiny bit of milk or cream, a teaspoon at a time, until it reaches your desired consistency. This spread is not only delicious but also holds its shape well for decorating your heart shaped cake, which is pretty handy, as a matter of fact.
Decorating Your Heart Shaped Cake - Pretty Touches
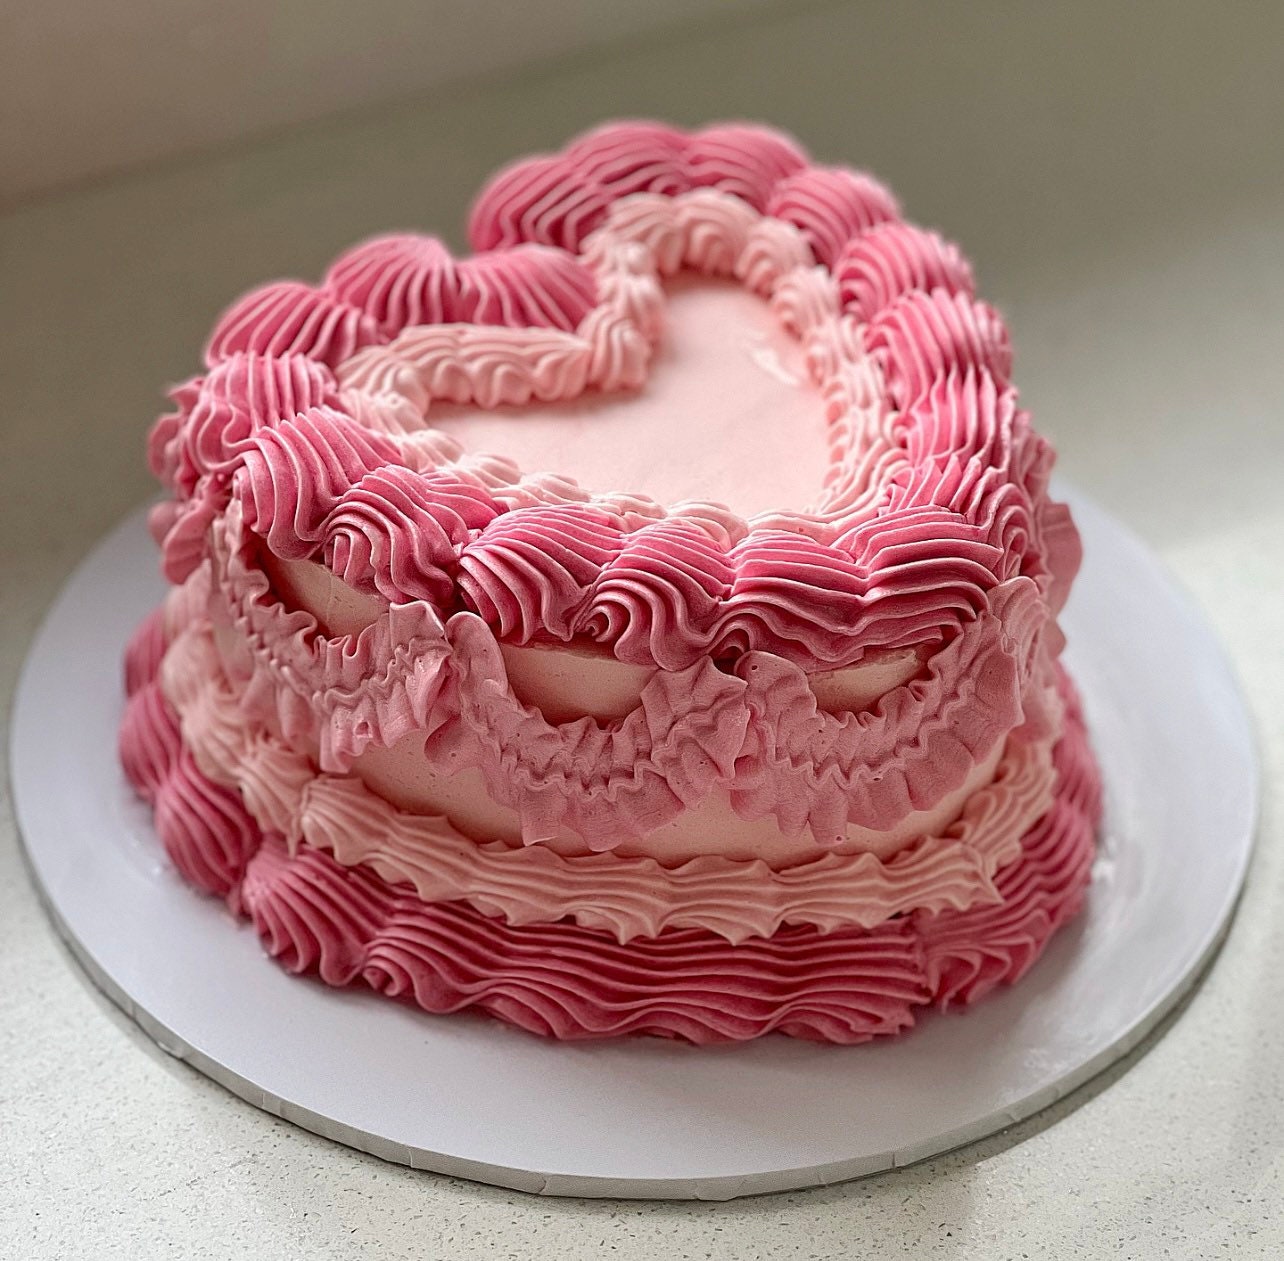
Once your heart shaped cake is assembled and has its crumb coat, the really fun part begins: adding all those pretty touches that make it look truly special. This is where you can let your creativity shine, whether you’re going for something simple and elegant or something a bit more elaborate. The great thing is, even simple designs can make a big impact on a heart shaped cake, so you don’t need to be a professional decorator, you know.
The cream cheese frosting, with its lovely texture, is perfect for piping. You can use a piping bag fitted with various tips to create different patterns and designs. Even just a simple star tip can create beautiful borders or small, delicate rosettes that look incredibly charming. It’s about adding those little details that show you’ve put thought into the presentation, making your heart shaped cake even more inviting, as a matter of fact.
Think about the occasion you’re making it for. For Valentine’s Day, little piped hearts, dots, or simple swirls in shades of pink or red can be incredibly effective. For a birthday, perhaps some sprinkles or a personalized message. The goal is to make your heart shaped cake look as appealing as it tastes, creating a memorable visual treat that complements the delicious flavors within, pretty much.
Simple Piping Ideas for Your Heart Shaped Cake
Even if you’re new to using a piping bag, there are some very simple techniques that can make your heart shaped cake look incredibly polished and professional. You don’t need a huge collection of tips or years of practice to create something beautiful. A basic round tip or a star tip can go a long way, honestly.
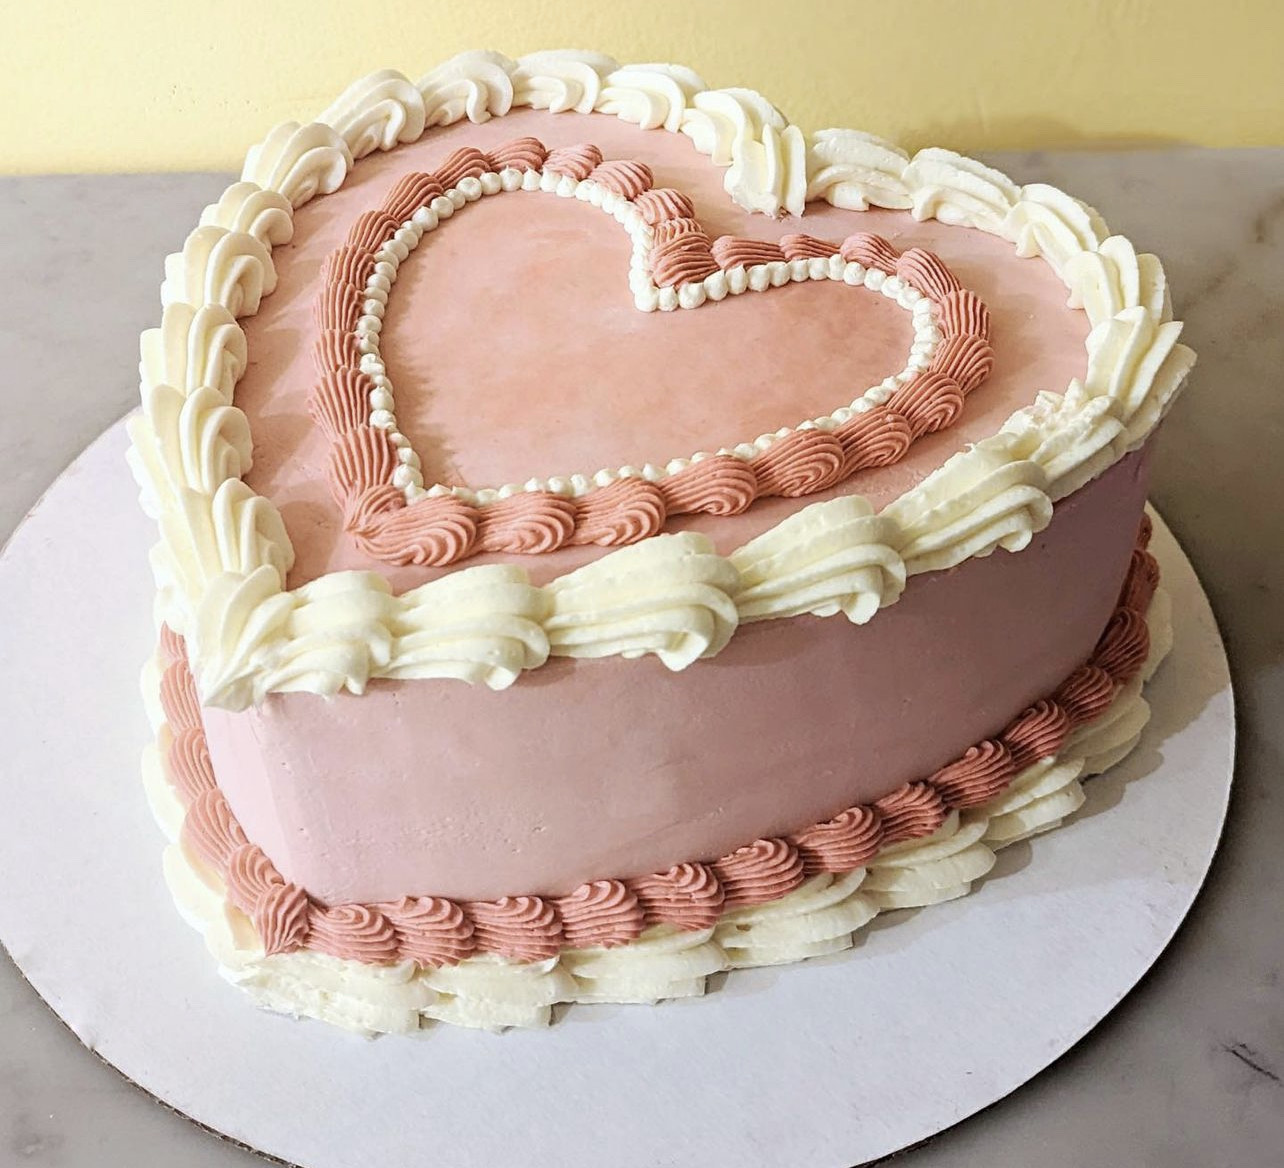
For a classic look, you can pipe a simple border around the base and top edges of your heart shaped cake. Using a star tip, you can create a series of small stars or shells that meet to form a continuous decorative line. This adds a nice, finished edge and helps to define the shape. You can also use a round tip to pipe small dots or beads around the edges, which is a very easy way to add a delicate touch, you know.
Another lovely idea is to pipe small rosettes or swirls on the top surface of your heart shaped cake. Just hold your star tip close to the surface, squeeze gently, and then release pressure as you pull away, creating a pretty little flower shape. You can cover the entire top with these, or just create a cluster in one corner. These simple piped details truly elevate the appearance of your heart shaped cake without requiring any complex skills, as a matter of fact.
Adding Flair to Your Heart Shaped Cake
Beyond piping, there are many other ways to add extra flair and personality to your heart shaped cake. These little additions can make a big difference in the overall look and feel, making your creation even more special and tailored to the occasion. It’s about those finishing touches that really make it pop, you know.
Sprinkles are always a fun and easy way to add color and texture. You can choose sprinkles that match your theme, like red and pink ones for Valentine’s Day, or colorful ones for a birthday celebration. Just gently scatter them over the top and sides of your heart shaped cake for an instant festive look. Edible glitter or shimmer dust can also add a touch of sparkle, making your dessert look truly magical, pretty much.
Consider adding fresh berries, like raspberries or strawberries, especially if they complement the red velvet and cream cheese flavors. A few perfectly placed berries can add a fresh, natural beauty to your heart shaped cake. You could also use chocolate shavings or curls for a more decadent feel. Whatever you choose, remember that these small details can turn a delicious baked good into a truly unforgettable centerpiece, so.
This guide has walked you through the steps to create a charming heart shaped cake using common round pans, detailing how to assemble the shape, prepare a tender red velvet base with its classic cream cheese topping, and add delightful decorative touches. It covers the process from a basic pre-packaged mix to the final pretty piping, ensuring a sweet and appealing result for any special moment, especially for Valentine's Day. The outcome is a truly endearing dessert that looks as good as it tastes.
Heart Shaped Layer Cake Wilton

Rose Heart Shaped Cake
*NEW* 7'' heart shaped cake *48 Hr Notice* - Butter Lane
