How To Braid Hair - Your Guide To Great Styles
There is something truly special about a hair braid, a look that just feels put together and has a certain charm. It is a way to keep your hair neatly held back, and it also gives a little bit of a fresh twist to what you might wear on any given day. You know, a good braid can make you feel quite ready for whatever comes your way, too it's almost.
Perhaps the idea of creating a braid on your own head seems a bit much, or maybe you think it is something that takes a lot of quick hand movements that are just too tricky to get right when you are doing it alone. Honestly, many people feel that way at first, so it is quite normal. But here's the thing, learning to style your own hair in these ways is not at all out of reach for you.
This guide is here to walk you through the ways to create some popular braided hairstyles, giving you the steps you need to get good at them. We will look at different kinds of braids, from the very basic to some that are a bit more involved, and we will also talk about how to get your hair ready so your braids look their very best. So, pull up to your mirror, maybe grab a brush, and let us get to it.
Table of Contents
- Getting Ready - How to Braid Your Hair
- What Are the First Steps for How to Braid?
- Learning the Classic Way to How to Braid
- The French Approach - How to Braid
- Trying the Dutch Style - How to Braid
- Is the Fishtail Hard to How to Braid?
- Beyond the Basics - More Ways to How to Braid
- Keeping Your Braids Looking Good - How to Braid
Getting Ready - How to Braid Your Hair
Before you even think about starting to make those pretty patterns with your hair, a little bit of preparation really makes a big difference in how your finished braids will look. It is a simple step, but it helps a great deal with keeping things neat and tidy. You see, the way your hair is prepared plays a rather significant part in the way your braids will end up looking, so it is worth taking a moment for this part.
Depending on the kind of braid you want to put together, there are a few things you might want to have close by. For instance, having a brush that works well on wet hair, or maybe just a regular hairbrush, is quite helpful. Also, some hair ties are usually a good idea to keep things in place. Sometimes, a little bit of product, like a light hairspray or a smoothing cream, can help tame those smaller hairs that tend to pop out. It is just about having the right tools for the job, in a way.
To get your hair ready, you might want to start with hair that is clean and dry, or perhaps just a little bit damp, depending on what feels best for the braid you are trying. Brushing out any tangles is a must, as this makes the hair much easier to work with. You want your strands to be smooth and easy to separate. This simple act of getting things ready really sets the stage for a braid that looks good and stays put, you know?
What Are the First Steps for How to Braid?
Starting with the very basic ideas of braiding can give you a strong foundation for making all sorts of interesting hair designs. It is like learning the letters before you can write a story. Once you get a feel for how the hair moves and how to hold it, the rest becomes much simpler. Honestly, a lot of people think braiding is just about quick fingers, but it is also about getting the basic hold right, too.
For almost any braid, you will begin by separating your hair into sections. The number of sections will change based on the braid type, but usually, it is three. Holding these sections firmly, but not too tightly, is a key part of the process. You want to have a good grip so the hair does not slip, but you also want to be gentle so you do not pull on your head too much. It is a balance, sort of.
Practice is a big helper here. If you are just starting out, you might find it helpful to practice on a doll, or even on a friend's hair, before trying to do it on your own head. This lets you see what you are doing more clearly and get a feel for the hand movements. When you do try it on yourself, pulling up to a mirror is a very good idea. It lets you keep an eye on things as you go, which is pretty useful, actually.
Learning the Classic Way to How to Braid
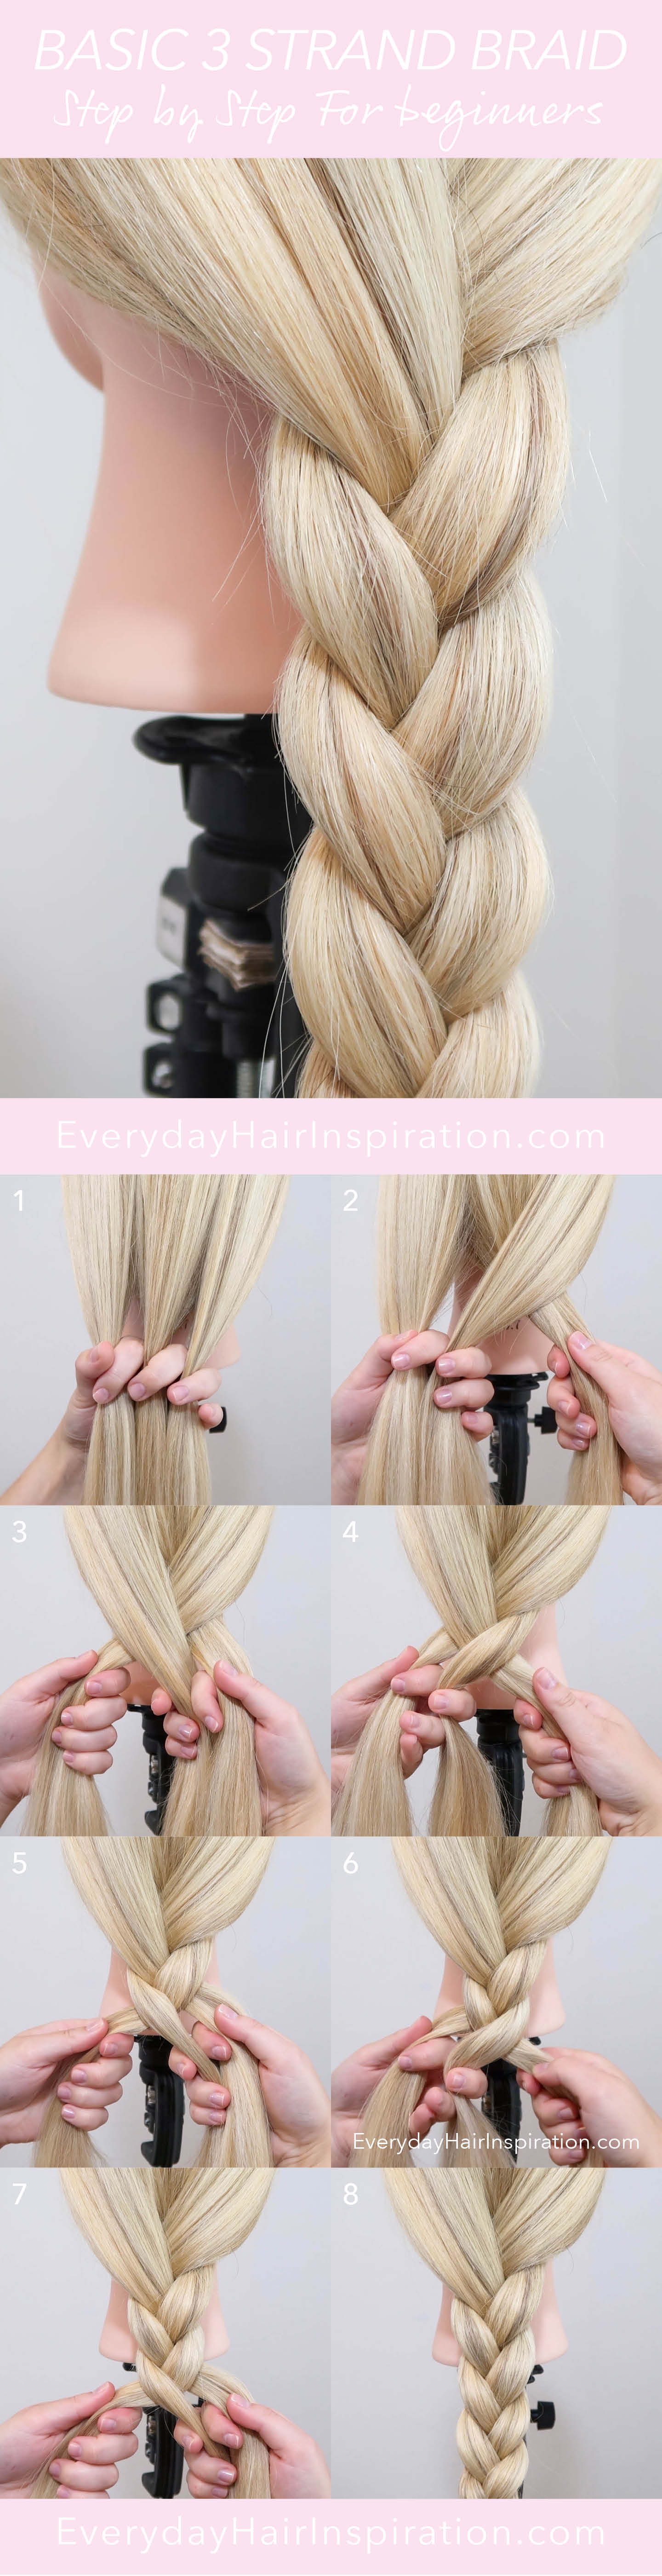
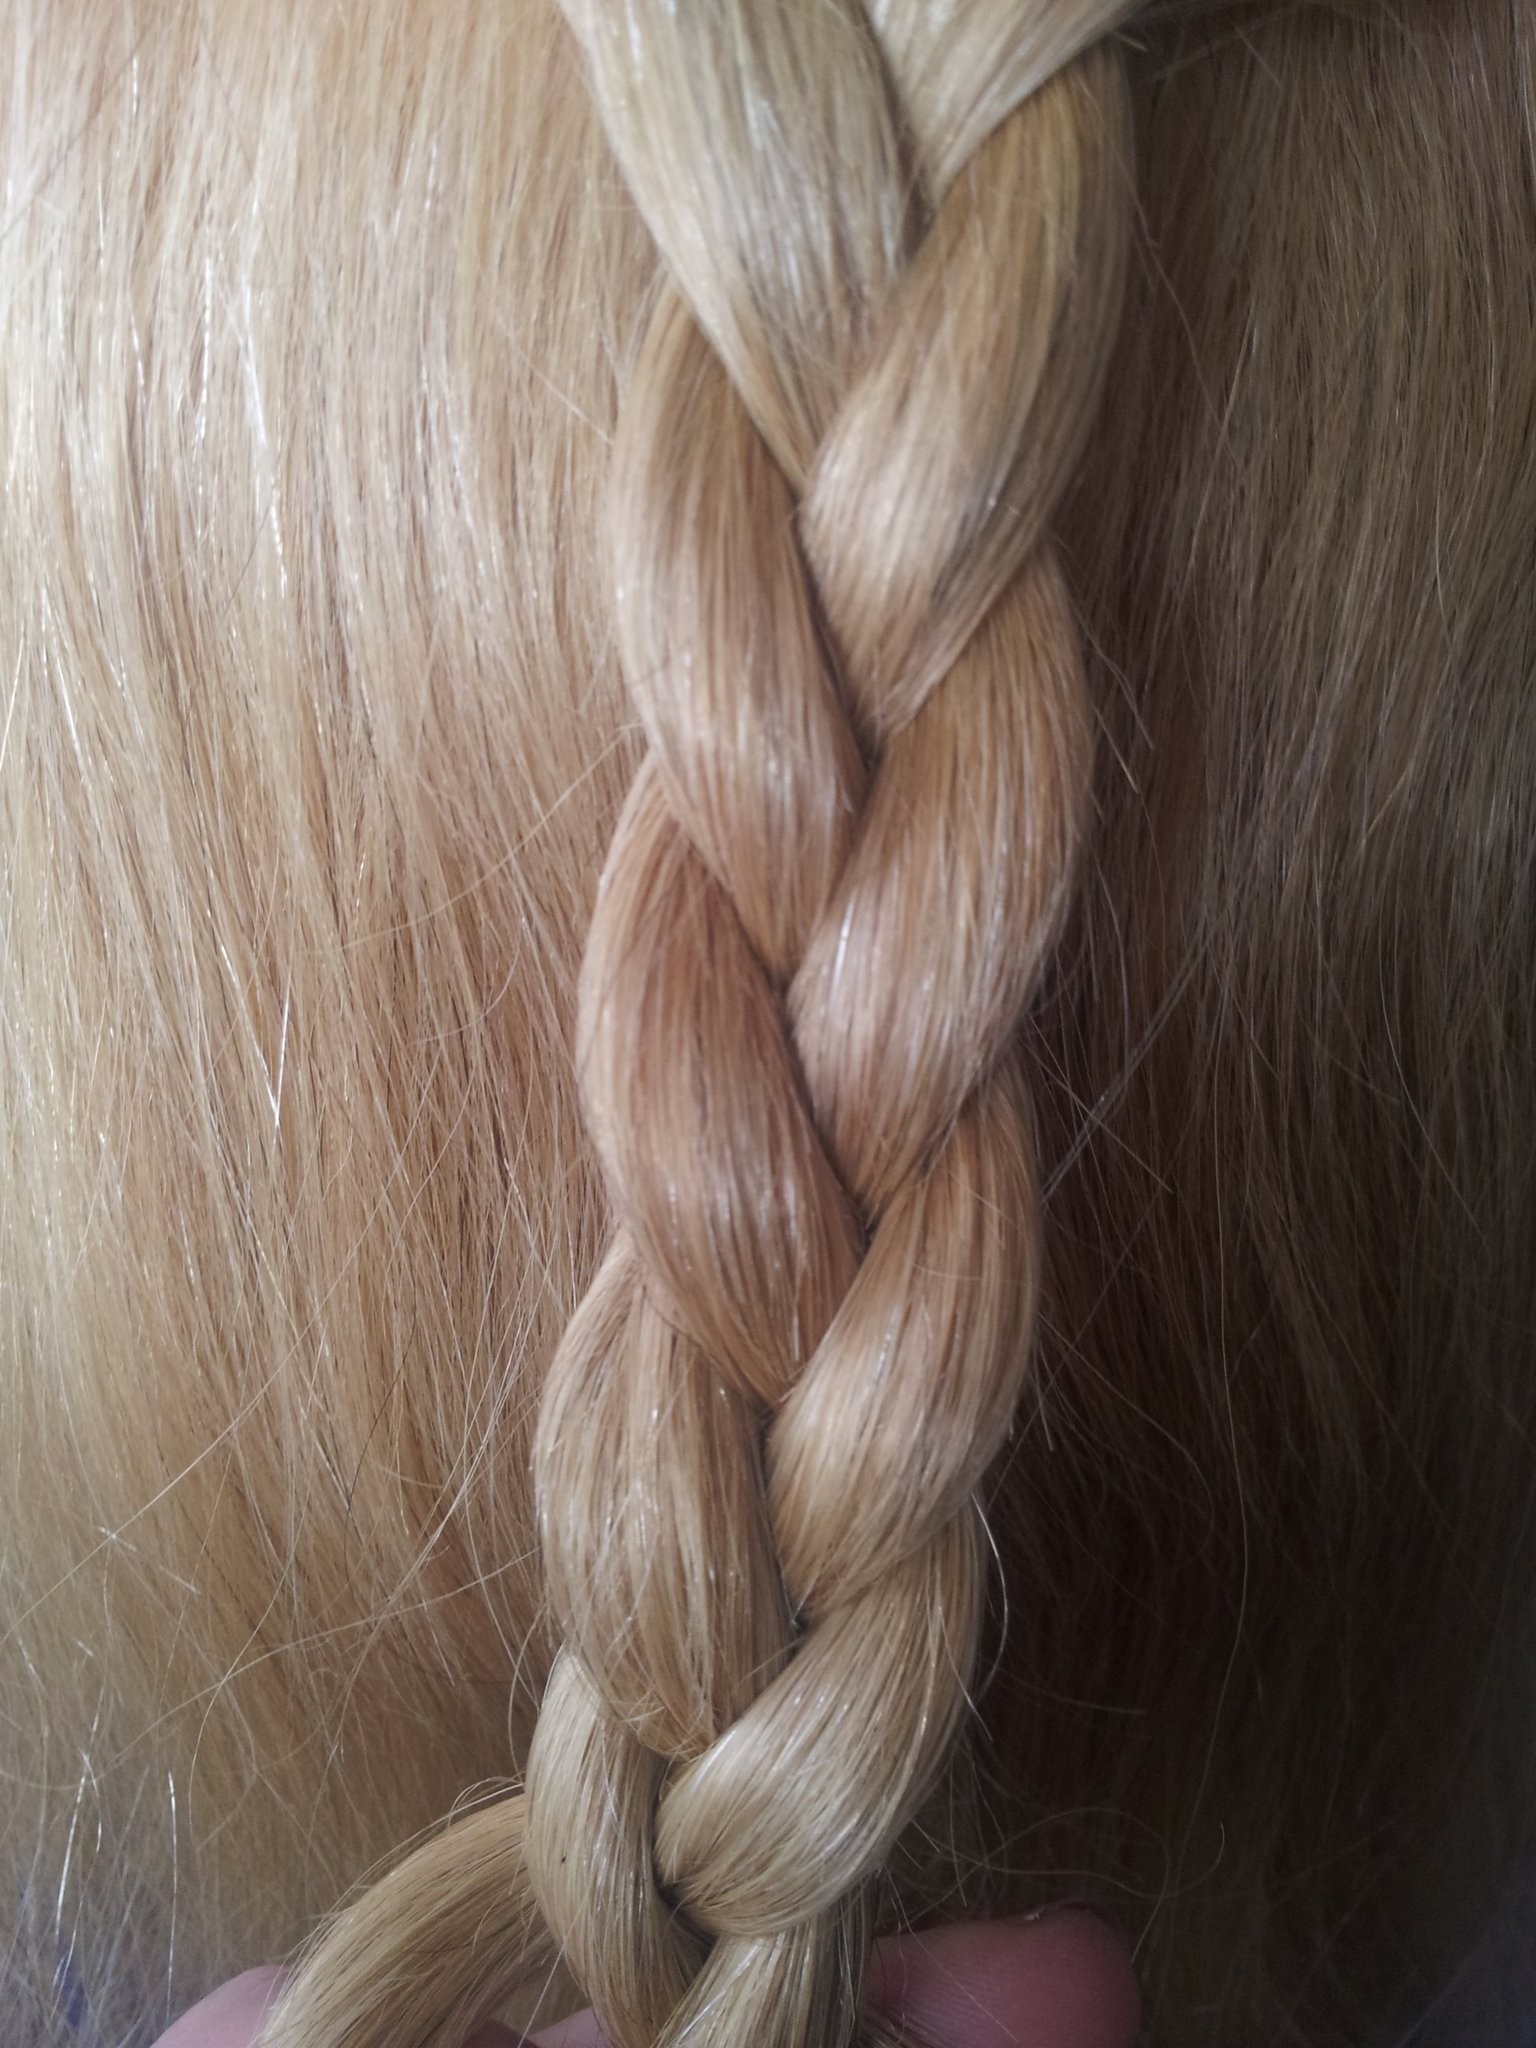
The classic braid, sometimes called a three-strand braid, is where most people begin their hair styling adventures. It is the most straightforward kind, and once you have this down, you will find it much easier to pick up other styles. This one is pretty much the building block for so many other looks. It is just a little bit like learning to ride a bike; once you get it, you really get it.
To begin this braid, first gather all your hair, or just a section of it, and hold it firmly in one hand. Then, with your other hand, divide this section into three equal parts. Think of them as piece number one, piece number two, and piece number three. Keeping these pieces separate but close together is pretty important for a neat result, you know?
Now, take the piece on the far right (let's say piece number three) and bring it over the middle piece (piece number two), so it becomes the new middle. Then, take the piece that is now on the far left (which was piece number one) and bring it over the new middle piece. You just keep repeating this pattern: always bringing the outside piece over the middle piece. You do this all the way down the length of your hair until you run out of hair to braid. Finish it off with a hair tie, and there you have it, a classic braid. It is really quite simple once you get the rhythm, as a matter of fact.
The French Approach - How to Braid
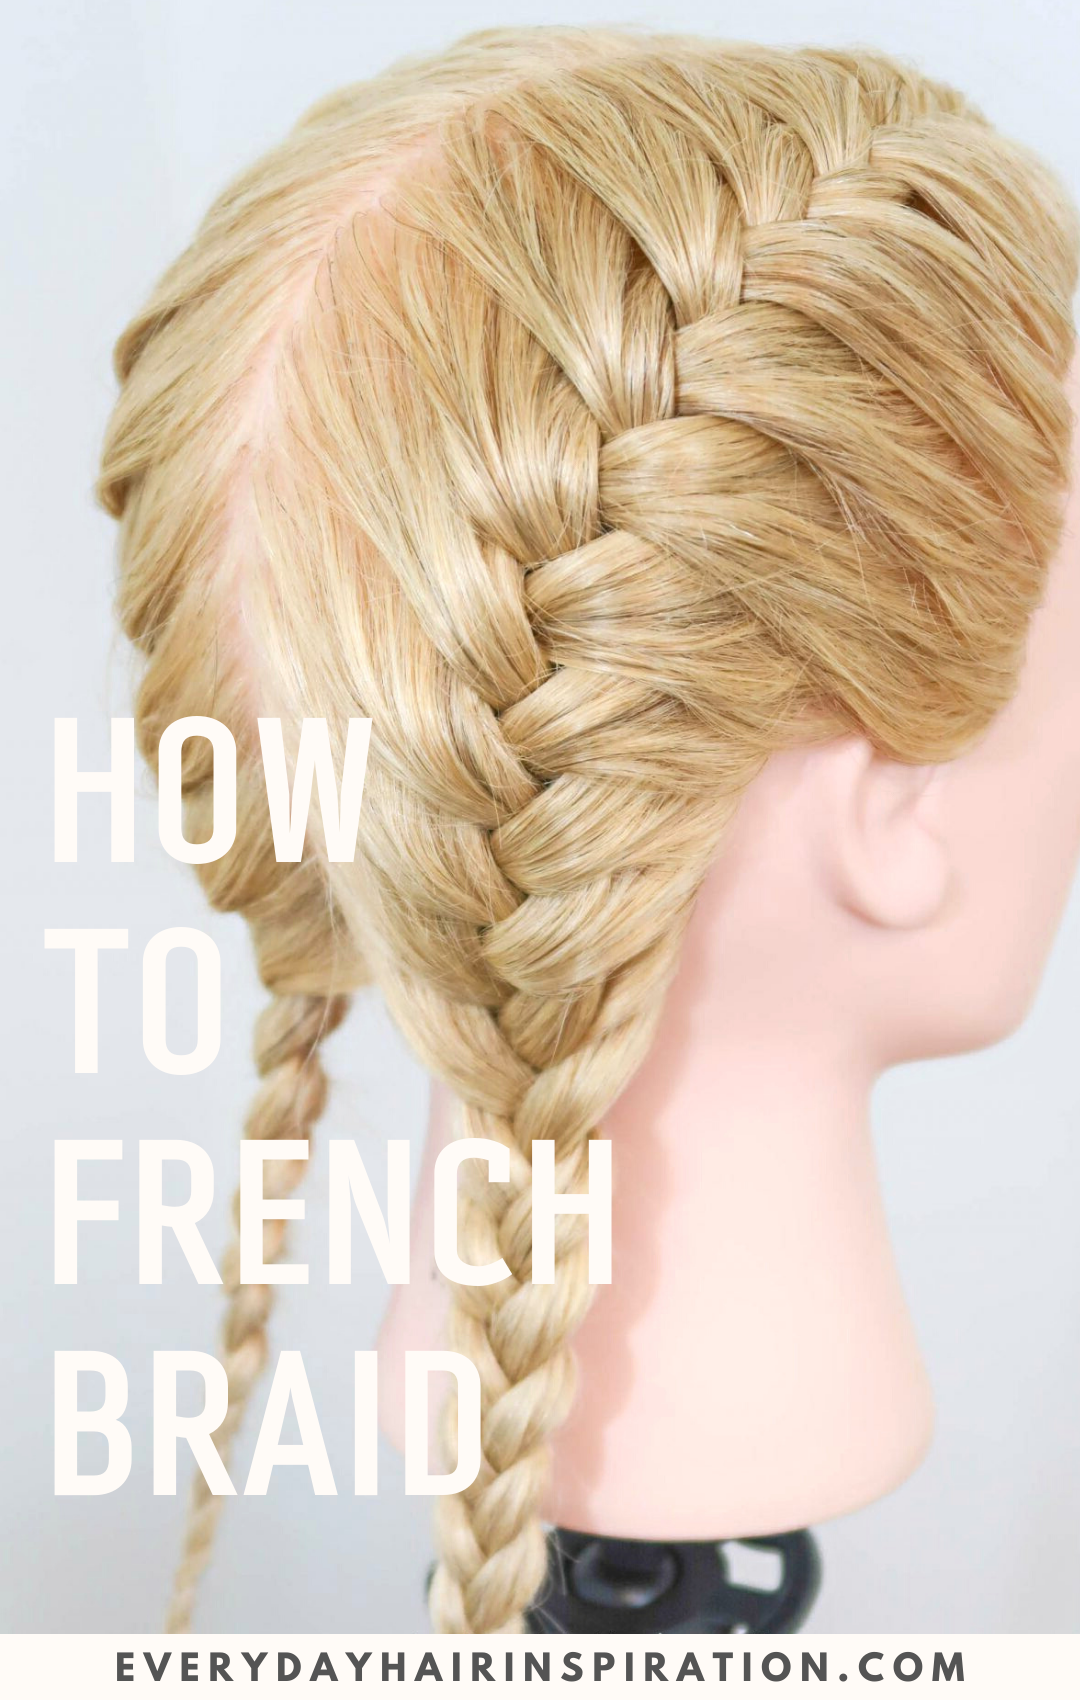
The French braid has a very elegant look, as it starts close to your head and slowly gathers more hair as you go down. It gives a really nice, close-to-the-scalp finish that holds hair back well. Learning to do this one well can feel like a real step up in your hair styling abilities, and it is honestly not as hard as it might seem at first glance, you know?
To start a French braid, take a small section of hair from the very top of your head, near your forehead. Divide this small section into three equal strands, just like you would for a classic braid. Begin by making one or two regular braid crosses, where you bring the outside pieces over the middle. This gets your braid going, in a way.
Now, here is where the French part comes in. Before you bring the next outside piece over the middle, you will add a small amount of loose hair from the side of your head to that outside piece. So, if you are bringing the right piece over, pick up a little bit of hair from the right side of your head and join it with that right piece before you cross it over. Do the same for the left side. You keep adding small bits of hair as you go, always joining them with the outside strand before you cross it over the middle. Continue this pattern, working your way down your head, until you have gathered all the hair from the sides. Once all the hair is in the braid, you just finish it off like a regular three-strand braid. It takes a little practice to keep the added sections even, but you will get the hang of it, pretty much.
Trying the Dutch Style - How to Braid
The Dutch braid is often called an "inside-out" French braid because it looks like it sits on top of your hair, rather than blending in. It has a really cool, raised effect that makes it stand out. If you can do a French braid, you are already very close to being able to do a Dutch braid, since the steps are quite similar, only with one key difference, honestly.
Just like with the French braid, you will begin by taking a small section of hair from the top of your head and dividing it into three equal parts. You will start with one or two regular braid crosses to get things going. This initial setup is essentially the same, so that is a good start, right?
The big difference with the Dutch braid is that instead of bringing the outside pieces *over* the middle piece, you bring them *under* the middle piece. So, take the right outside piece and bring it *under* the middle piece. Then, take the left outside piece and bring it *under* the new middle piece. As you continue, just like with the French braid, you will add a small amount of loose hair from the side of your head to the outside piece *before* you bring it under the middle. You keep adding hair and bringing the strands under, working your way down your head. This creates that distinct, raised look. Once all your hair is gathered, finish it off with a regular three-strand braid, bringing the pieces under each other. It is really just a small change that makes a big visual impact, you know?
Is the Fishtail Hard to How to Braid?
The fishtail braid looks very intricate and special, almost like the bones of a fish, which is where it gets its name. Many people think it is a really difficult braid to create, but it is actually quite simple once you get the hang of it, and it only uses two main sections of hair, which is kind of neat. It is a really pretty style that can make a regular day feel a bit more special, actually.
To start a fishtail braid, gather all your hair, or the section you want to braid, into two equal parts. You will not be working with three strands here, just two big ones. This might feel a little different if you are used to the classic braid, but it is pretty straightforward, you know?
Now, take a very small strand of hair from the outside edge of the right section. This strand should be thin, almost like a pencil lead. Bring this small strand over the top of the right section and join it with the inside edge of the left section. Then, do the same thing on the other side: take a very small strand from the outside edge of the left section, bring it over the top of the left section, and join it with the inside edge of the right section. You keep repeating this pattern, always taking a small piece from the outside of one of the two main sections and bringing it over to join the other main section. The smaller the strands you take, the more delicate and detailed your fishtail braid will look. Keep going until you have braided all the way down, then secure it with a hair tie. It is a bit repetitive, but the result is quite lovely, sort of.
Beyond the Basics - More Ways to How to Braid
Once you feel comfortable with the classic, French, Dutch, and fishtail braids, you will find that there are many other fun and interesting ways to style your hair. These other styles often build upon the basic ideas you have already learned, adding little twists or combining different techniques. It is pretty cool how many looks you can get from just a few core skills, you know?
For example, there is the rope braid, which is really just twisting two sections of hair around each other. It is super simple but can look quite charming. Then there are styles like the ladder braid, which involves making small, separate braids that seem to climb up a larger one. And for something that goes all around your head, there is the halo braid, which often uses a French or Dutch braiding technique to create a crown-like effect. Waterfall braids are also very popular, where strands of hair flow down like a cascade, which is quite pretty, actually.
Each of these styles has its own little secret to getting it right, but the core idea of separating hair and crossing strands remains. Exploring these different ways to braid can really let your own ideas shine and help you create looks that feel very much like you. It is a bit like having a whole new set of tools to play with for your hair, basically.
Keeping Your Braids Looking Good - How to Braid
Making a braid is one thing, but keeping it looking neat and tidy throughout the day is another. You want your hard work to stay put and look good for as long as possible, right? There are a few simple things you can do to help your braids stay looking really neat and to make the whole process a bit easier on yourself, too.
One good tip is to make sure your hair has a little bit of grip. If your hair is too soft or slippery, braids can tend to fall out easily. Sometimes, using a little bit of dry shampoo or a texturizing spray before you start can give the hair some hold. This makes it easier to keep the strands separate and prevents them from slipping out of the braid. It is a small step that can make a big difference, you know?
When you are braiding your own hair, especially if you are just starting, it can feel a bit awkward because you cannot see everything you are doing. Using a mirror, or even two mirrors to see the back of your head, is very helpful. Also, do not be afraid to take breaks if your arms get tired. It is not a race. The more relaxed you are, the better your braid will turn out. If a strand pops out, you can often use a small bobby pin to tuck it back in. It is all about patience and a little bit of practice, honestly.
Remember that even expert braiders had to start somewhere. Your first few attempts might not be perfect, and that is completely fine. Each time you try, you will get a little better, a little quicker, and your braids will look a little neater. It is about enjoying the process of learning and finding what works best for your hair. So, keep at it, and you will be creating lovely braided looks in no time, pretty much.
This guide has walked you through the steps for getting your hair ready, understanding the very first moves in braiding, and then creating classic, French, Dutch, and fishtail braids. We also touched upon other styles like rope, ladder, halo, and waterfall braids, and shared some useful ideas for keeping your braids looking good once they are done.
Ultimate Guide To Braiding: Master The Art Of Intricate Hair
French Braid For Beginners - Easy "How To" Tutorial - Everyday Hair
How To Do A Basic Three Strand Braid · How To Style A Braid / Plait
