Crafting Your Perfect Minecraft Bridge - A Creative Guide
Building in Minecraft offers a wonderful chance to express your ideas, and creating a sturdy connection across a gap is, you know, a pretty big part of that experience. Whether you are spanning a wide river or linking up parts of a mountain, a well-made bridge can really make a difference to how your whole build looks and feels. It is, in a way, about more than just getting from one place to another; it is about making a statement with your construction. People often spend a lot of time thinking about how to make their structures both useful and pleasing to the eye, and bridges are a prime example of where these two things meet.
Think about the sheer joy of seeing your finished creation stretch across a chasm, connecting distant points with a path you made yourself. This kind of building, it is almost like solving a fun puzzle, where you figure out the best way to make things fit together. You might be aiming for something simple and quick, or perhaps a more involved piece of engineering that really stands out. The way you approach building a bridge can really shape your entire Minecraft experience, allowing for all sorts of neat ideas to come to life.
This discussion will walk you through some thoughts on making your bridges, from figuring out where to put them, to picking up some cool building moves, and even how certain visual packs can change their appearance. We will also touch on how people practice their quick building skills, and how some clever setups can make even complicated bridge types quite simple to put together. So, prepare to think about connecting those distant spots in your world with style and a bit of practical know-how.
Table of Contents
- What Makes a Great Minecraft Bridge?
- Planning Your Minecraft Bridge Placement
- Bridging Skills - From Beginner to Pro
- Enhancing Your Minecraft Bridge Experience
- Building a Minecraft Bridge in Challenging Spots
What Makes a Great Minecraft Bridge?
When you set out to create a bridge in Minecraft, it is pretty cool to think about how you can make it both strong and pleasing to the eye. There is, actually, a way to figure out the very best spots to place your building blocks, especially when you are aiming for something precise, like getting things just right down to a small part of a block. This means your structure can look very neat and line up perfectly with its surroundings. It is almost like having a secret helper that tells you where each piece should go, making the whole building process a little bit smoother and more exact.
This approach to placing items helps you build a structure that feels very solid and well-planned. It is about taking the guesswork out of where to put things, ensuring that your bridge does not just look good, but also functions exactly as you intend. For example, when you are trying to make something that fits into a very specific space, knowing the best spots to put your materials, rounded to the nearest small piece, can really save you time and effort. It is a bit like having a blueprint that is always telling you the right way to build, which is quite helpful for any building project.
Planning Your Minecraft Bridge Placement
Deciding where your bridge will go is a really important first step. You need to think about the space you want to cross and how your structure will fit into the surrounding area. A very common size for a bridge is two blocks across, which gives you enough room to walk comfortably without feeling too cramped. This width is usually a good choice for most general purpose crossings, allowing for easy movement back and forth. So, you know, when you are picking the spot, keep that two-block measurement in your thoughts.
Once you have picked the general area for your crossing, you will want to prepare the ground a little. For a bridge that is two blocks wide, it is often a good idea to dig down a few levels, perhaps three blocks deep, where you want the structure to begin. This gives you a solid base to start from and helps the bridge look like it is properly connected to the ground. If you are finding it a bit hard to picture this, sometimes seeing a picture can make it much clearer, as it really helps to show the depth needed for a good foundation. This initial digging, it is really about getting things ready for a strong start.
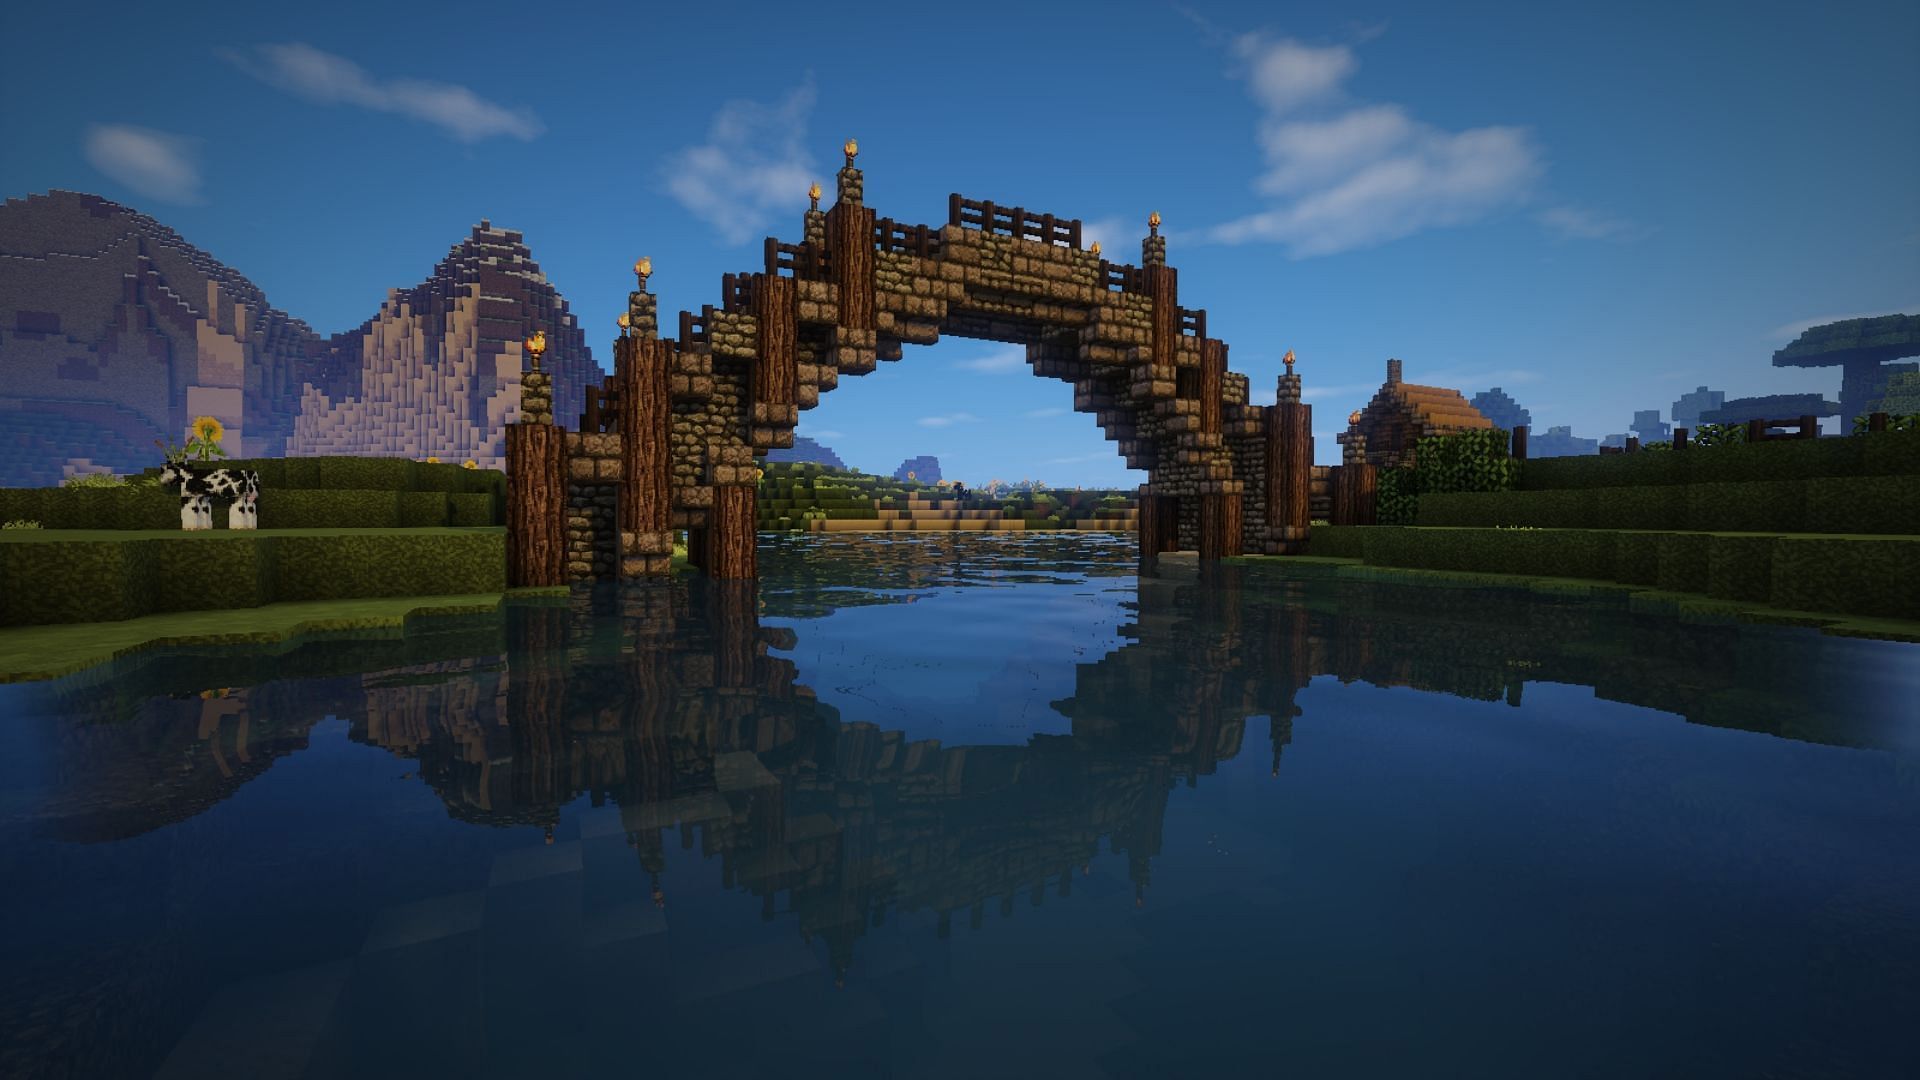
How to Set Up Your Two-Block Wide Minecraft Bridge
Setting up your two-block wide Minecraft bridge involves more than just putting down blocks; it is about creating a path that feels natural and safe. After you have dug down those three levels, you can start laying down the first pieces of your bridge. This base layer is quite important, as it will support everything else you build on top. You might find that starting with a strong, flat line helps you keep the rest of the structure straight and even. It is, you know, like building the first row of a wall, where everything else lines up from there.
When you are building, you might also think about how high you want your bridge to be. Sometimes, you might need to add steps to get up to the main part of the bridge, especially if it is spanning a deep valley or connecting to a higher piece of land. While I, myself, might prefer adding stairs for access, you can truly do whatever you like better for your own structure. The idea is to make it easy for people to get onto the bridge, and also to make sure it looks good from all angles. So, you have a lot of freedom to make it your own, which is really quite nice.
Bridging Skills - From Beginner to Pro
Becoming good at building bridges in Minecraft can be a fun challenge, and it is something people often practice to get better at. There are even informal ways of keeping track of how much you have improved, like earning titles for reaching certain numbers of successful crossings. For example, someone who has completed fifty bridge-building challenges might be called a "bridge rookie," while a person with a hundred successes could be known as "bridge iron." These little milestones, they really show how much practice can help you grow your building abilities.
Many people actually learn their building methods by watching others, especially through online videos. Starting out by watching people create things on a video platform can give you a lot of ideas and show you different ways to approach building. It is a very common way for people to pick up new tricks and techniques for their Minecraft projects. So, if you are just beginning to explore building in this way, seeing what others have done can give you a lot of good starting points.
What is Noob Bridging in Minecraft?
One of the most basic ways to build a bridge, often called "noob bridging" or "crouch bridging," involves a very simple set of actions. This method means you walk straight backwards while holding down the shift key and the right mouse button. This particular way of moving allows you to place blocks directly behind you as you slowly move, which is quite useful for staying safe. It is, really, the slowest method for building a bridge, but it offers a lot of control and reduces the chance of falling off, which is why it is often the first technique people learn.
This technique is, you know, pretty much the same as the "noob bridging" method, but with a slight change in how you handle things. Instead of just doing the basic actions, you might adjust your timing or your view a little bit. It is still about moving slowly and carefully, placing blocks one by one to create your path. This careful approach makes it a very safe way to build, especially when you are just getting used to making bridges or when you are crossing a very dangerous spot where a fall would be, you know, very bad. It is a steady way to get things done.
Are Complex Drawbridge Tutorials Necessary for Your Minecraft Bridge?
When it comes to building more involved structures, like a bridge that can pull back or extend, you might have seen many guides that seem, honestly, really complicated. These guides often use a lot of intricate mechanisms that can be hard for someone who is not very familiar with certain game mechanics to put together. It can feel a bit overwhelming trying to follow all those steps, especially if you are not, you know, a master at working with the game's electrical-like components.
However, it is actually possible to create an advanced bridge that can pull back without all that fuss. I have seen ways to make these kinds of structures very simple to set up, so that people who are not, say, experts with the more technical parts of the game are not left feeling confused. It is about finding a way to make these cool moving bridges accessible to everyone, which is, I think, a much better approach. This way, more people can enjoy building something that seems very clever without needing to spend hours figuring out complex wiring.
There is even a type of very advanced bridge that pulls back, and it might be one of the first of its kind that actually works this way. This particular bridge stretches a good distance, about four blocks wide, and has two open spaces underneath it. This design allows for a lot of flexibility and can be quite impressive to see in action. It is, in a way, a testament to how creative people can get with building things that move and interact with their surroundings.
For those who want to get better at their quick building moves, practicing in special areas is a great idea. These areas, sometimes called "bridge scrims," are perfect for people who are, say, at a certain stage in their skill development. In these practice spots, you can learn when it is a good idea to quickly place many blocks at once, and when it is better not to do that. You also get to figure out when to pull back from a confrontation and wait for a better moment to act. It is, basically, a place to really hone your quick building and tactical thinking.
Enhancing Your Minecraft Bridge Experience
The way your Minecraft world looks can really change how you feel about your builds, and that includes your bridges. Many players use special packs that change the appearance of blocks and items, giving the whole game a fresh look. For example, some people use a "16x pack" called Nebula, which they find works well for certain game modes like UHC, OP, and Skywars. This kind of pack, it changes the textures just enough to make things feel different without being too overwhelming.
Using Resource Packs for Your Minecraft Bridge Look
Beyond general appearance changes, there are also specific visual packs that are made just for making bridges look better. One example is a "bridge overlay" created by someone known as Red Archer, which is, you know, specifically for bridge building. Then there are other packs like ASDA 16x and ASDA V2 16x, which are also often chosen for their look when building bridges. Another one, Snowfault 16x, is mostly used for different game modes, but it still shows how much these visual changes can affect your overall experience. It is really about picking what feels right for you and your building style.
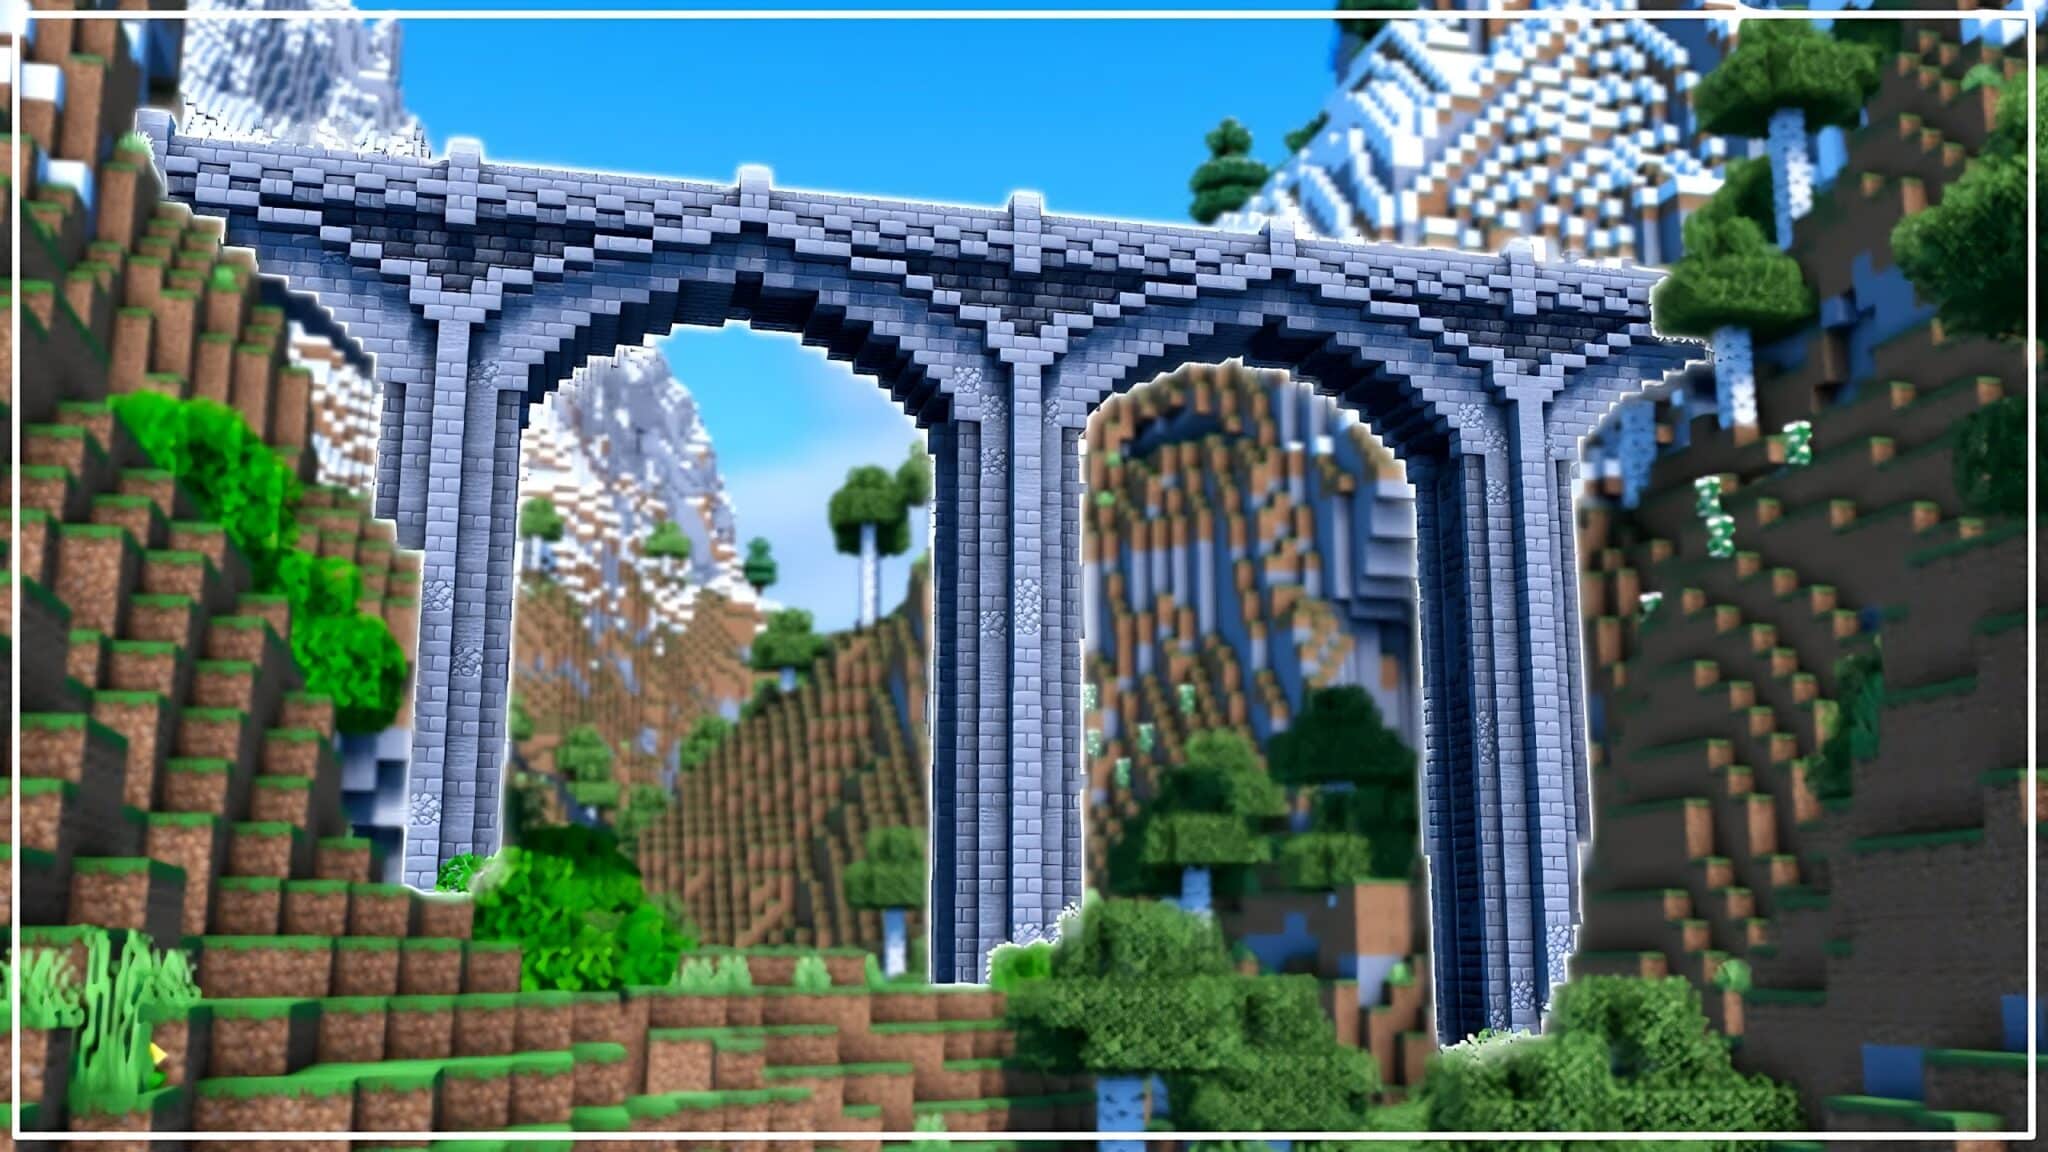
Building a Minecraft Bridge in Challenging Spots
Sometimes, the most interesting building projects happen in tricky locations. For instance, I have a particular mountain where I am putting together a structure. You can see a natural opening in the mountain lower down, and that is where the main way in is located. Higher up on this same mountain, I want to create several bridges and a set of steps to connect different levels. This kind of building, it really makes you think about how to link different parts of a landscape together in a visually pleasing way.
When you are building a bridge in a place like a mountain, the foundation is really important. This is what the bridge looks like with its base laid out. To get up to the main part of the bridge, I found I needed to put in some stairs. However, you can certainly do whatever you like better for your own construction. Since I do not particularly enjoy seeing certain elements, I make choices that fit my personal taste, and that is what building is all about – making it your own. It is, you know, about personal preference and making your structure feel right to you.
In some scenarios, bridges are not just for getting around; they are part of a challenge or a game. Imagine two separate groups of players, each starting on their own island. These islands are connected by a path that is only one block wide. The goal for the players is to move across this narrow path and confront the opposing group to get past them. This kind of setup makes the bridge a central part of the action, where every step you take really matters. It is, basically, a very direct way to create a tense and exciting encounter.
This situation is, you know, very much like the "noob bridging" method, but with a slight twist. Instead of simply focusing on the careful backward movement, the added pressure of an opposing group changes how you might approach crossing that one-block wide path. It takes the basic skill and puts it into a competitive environment, where speed and precision become even more important. It is a good way to test your basic building and movement skills under pressure.
This article has explored various aspects of creating bridges in Minecraft, from the precise placement of blocks and the standard two-block width, to preparing the ground by digging down three levels. We looked at how players track their progress with "bridge rookie" and "bridge iron" titles, and how many learn through online video channels. The discussion covered advanced retractable bridges, highlighting simpler setup methods for those new to complex game mechanics. We also touched upon "noob bridging" or "crouch bridging" as a slow, safe movement technique, and how bridge scrims offer practice for strategic building. The piece also mentioned how different resource packs, like Nebula 16x and Red Archer's bridge overlay, can change the visual appeal of structures. Finally, we considered building in challenging locations such as mountains, including the need for foundations and stairs, and how one-block wide bridges can create intense team-based scenarios.
10+ Best Minecraft Bridge Ideas - TBM | TheBestMods
A beautiful (and practical) simple bridge build I saw on Google, it
5 best Minecraft bridge designs for beginners
